
A Creative Twist on a Classic Craft
Looking for a scrap-busting craft that’s fun, simple, and a bit addictive? Look no further than coiled rope technique. It's perfect for turning sewing offcuts and scraps of fabric into bowls, baskets, bags, coasters, mats, rugs, practical storage and much more.
At it's most basic level, all you need is some rope and fabric to get going. However, to really take your makes to the next level, use any basic sewing machine and the possibilities are endless.
We’ve popped a few handy tips below to help you get stuck in — and if you’d rather learn in person (with tea, chats, and plenty of inspiration), check out our Coiled Cord workshops. Happy making!
What is the Coiled Rope Technique?
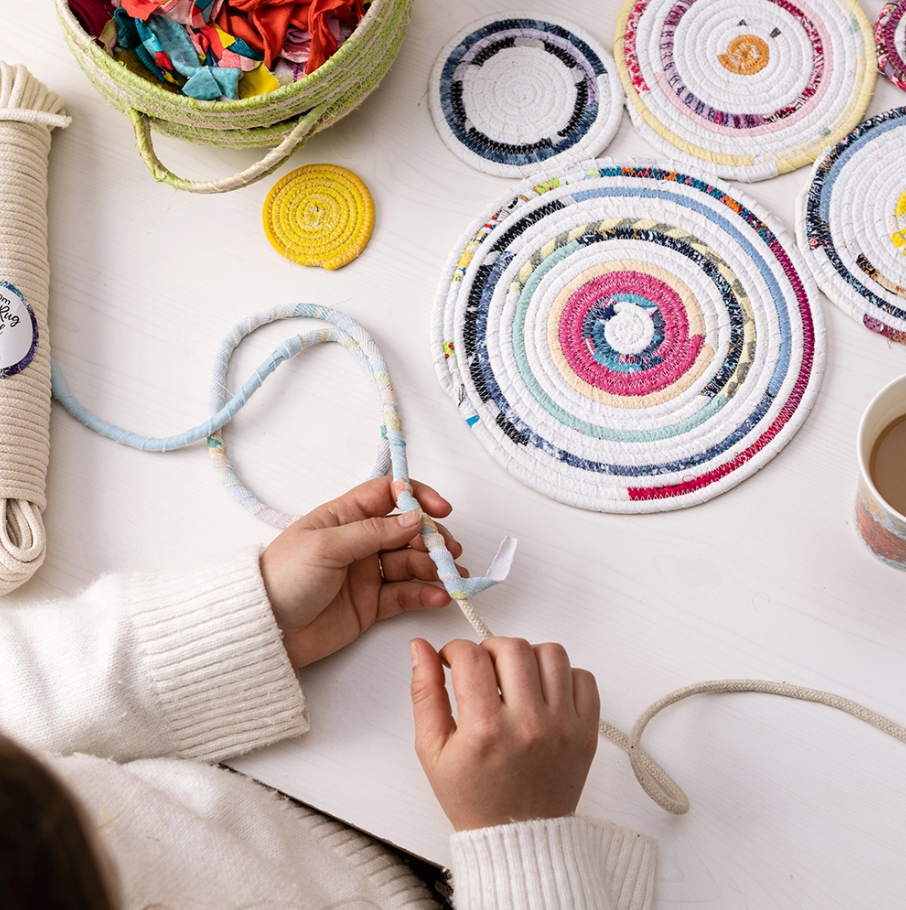
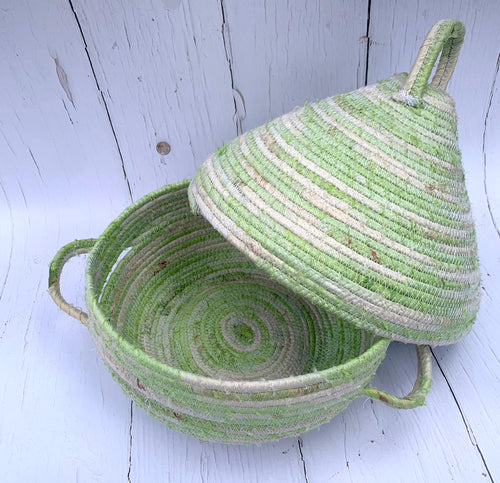
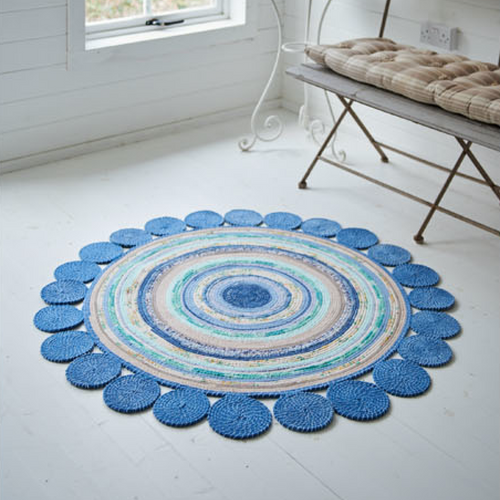
Coiled rope rag rugging, sometimes known as the coiled cord craft, is one of the most sculptural and versatile rag rug techniques we teach. It’s amazing how a simple length of rope and some colourful fabric strips can be transformed into sturdy baskets, beautiful bowls, mats, and even rugs.
The process is pretty intuitive — you wrap fabric around the rope as you go, stitching the coils together to build up your shape row by row. It’s a calming, repetitive craft that’s easy to get the hang of and hard to put down once you start. What we love most is how creative you can get with it — mix fabrics, play with shape and colour, or keep it simple and rustic. The possibilities are endless, and each piece is completely unique. We think it creates some of the most giftable items - coaster sets, placemats, bowls and bags make thoughtful presents for friends and loved ones.
What Equipment Do I Need to Make Coiled Rope Projects?
Here’s what we recommend to get you started:
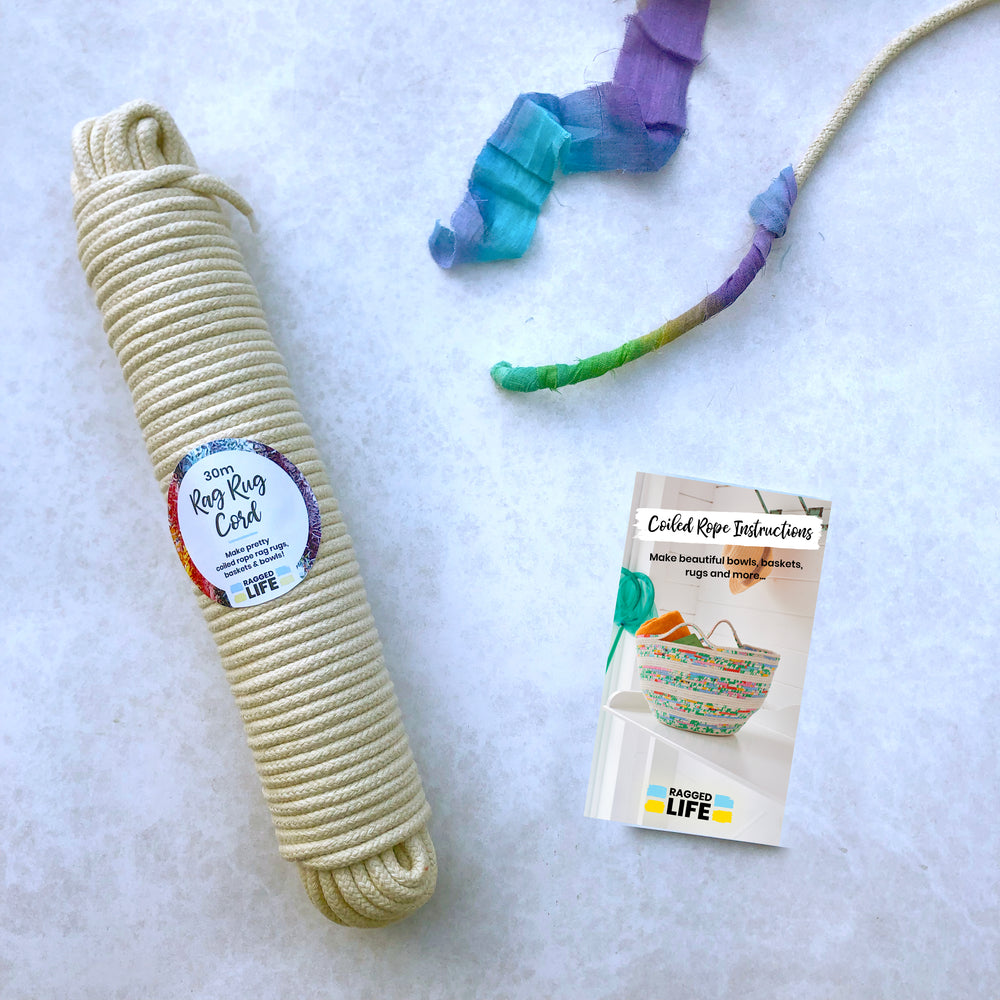
- Rope - this forms the structure of your project. We use our Ragged Life Cotton Cord, which is flexible but sturdy enough to hold its shape (important for bowls and baskets). The thickness of the rope affects how chunky your final piece looks. Our 6.5mm cord is soft enough for the sewing machine needle to pass through easily.
- Fabric Strips - these get wrapped around the rope to add colour, texture, and strength. Old clothes, offcuts, or pre-cut strips all work well. The thinner the fabric, the easier it is to work with. See below for more tips on fabric.
- Scissors / Rotary Cutter & Mat- we like to cut fabric strips by cutting through lots of layers at once (it doesn't matter if strips are a little wiggly), using super sharp Rag Rug Scissors. See them in action here.
- (Optional) Sewing Machine. Most projects are stitched together using a wide zig zag stitch on a sewing machine. However, a no-sew option is to glue gun the cord around pre-made items like plant pots or wastepaper bins.
- (Optional) Sandwich Clips / Wonder Clips. So the coiling doesn't unravel when you need to put it down.
Cotton Cord / Rope
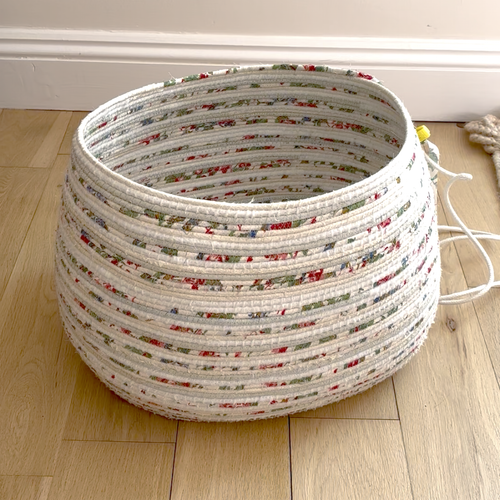
The rope you use makes a big difference – and we’ve developed our Ragged Life cotton cord to be just right. It’s the perfect balance of strength and softness, with a synthetic core that gives your projects real structure (ideal for bowls, baskets and bags that actually hold their shape!) We haven’t met a sewing machine yet that didn’t love our rope - the needle is able to pass through without any trouble.
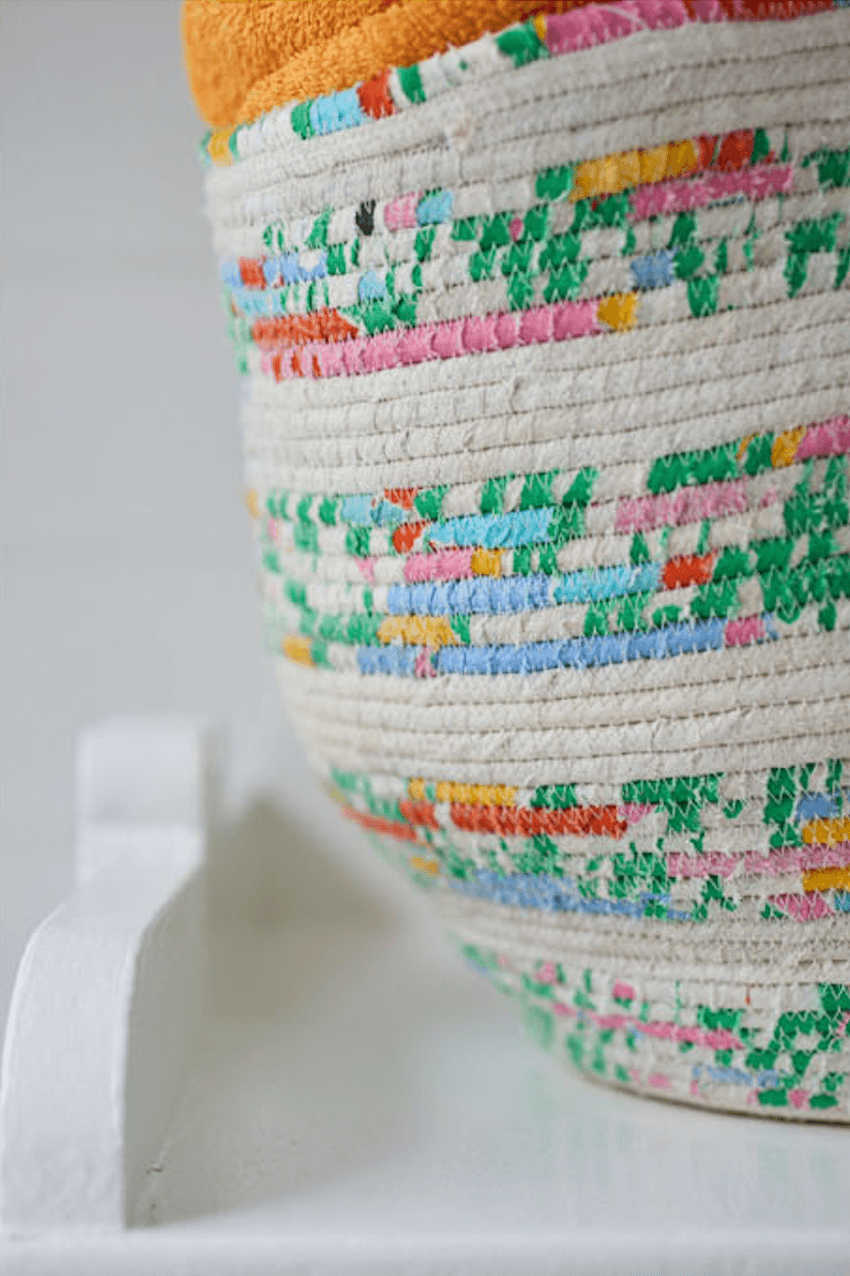
The neutral cream cotton outer even looks lovely when left partly exposed. In fact, lots of makers leave little sections of rope peeking through for texture – it’s a subtle but stylish touch.
We sell our cotton rope in 10m and 30m skeins, but don’t worry if you’re planning a bigger project – lengths can easily be joined together as you go. It’s a great all-rounder for beginners and seasoned crafters alike, and once you try it, we think you’ll be back for more!
Fabric Strips
When it comes to fabric for coiled rope rag rugging, the general rule is: the thinner, the better. Thinner fabrics are much easier to wrap neatly around the rope and give you a smoother, more controlled finish. I steer clear of thick or bulky materials like upholstery fabric, which can be stiff, awkward to handle, and hard to stitch through.
Fabrics with a bit of elastic (like jersey or stretchy t-shirts) do work, but they have a habit of curling up as you wrap, which can make things a little more fiddly. That said, it doesn’t affect the finished look too much, so it really comes down to how much you like the colour!
If you’re worried about fraying, don’t be – most of it gets stitched down by the zig zag stitch, so it’s rarely an issue. But if you’re going for a super polished, clean look, avoid really fray-prone fabrics like loosely woven linens or feathery polyesters.
Cut strips 1-2.5cm in width and between 15 and 70cm in length. Too long and the strips get tangled as you wrap them around the cord and any shorter and you'll be doing a lot of joining! Cut thicker fabrics narrower as otherwise they bunch on the cord and thinner fabrics wider to cover the cord thicker. Watch how to create fabric strips from clothing here.
Tip: If you're looking for pre-cut strips, our Ragged Life recycled sari silk ribbon is ideal for coiled projects. It has a beautiful sheen, which adds quality and depth to a design.
Sewing Machine & Thread
If you decide to try the coiled rope technique using a sewing machine (which we highly recommend!), all you really need is a basic zig zag stitch.
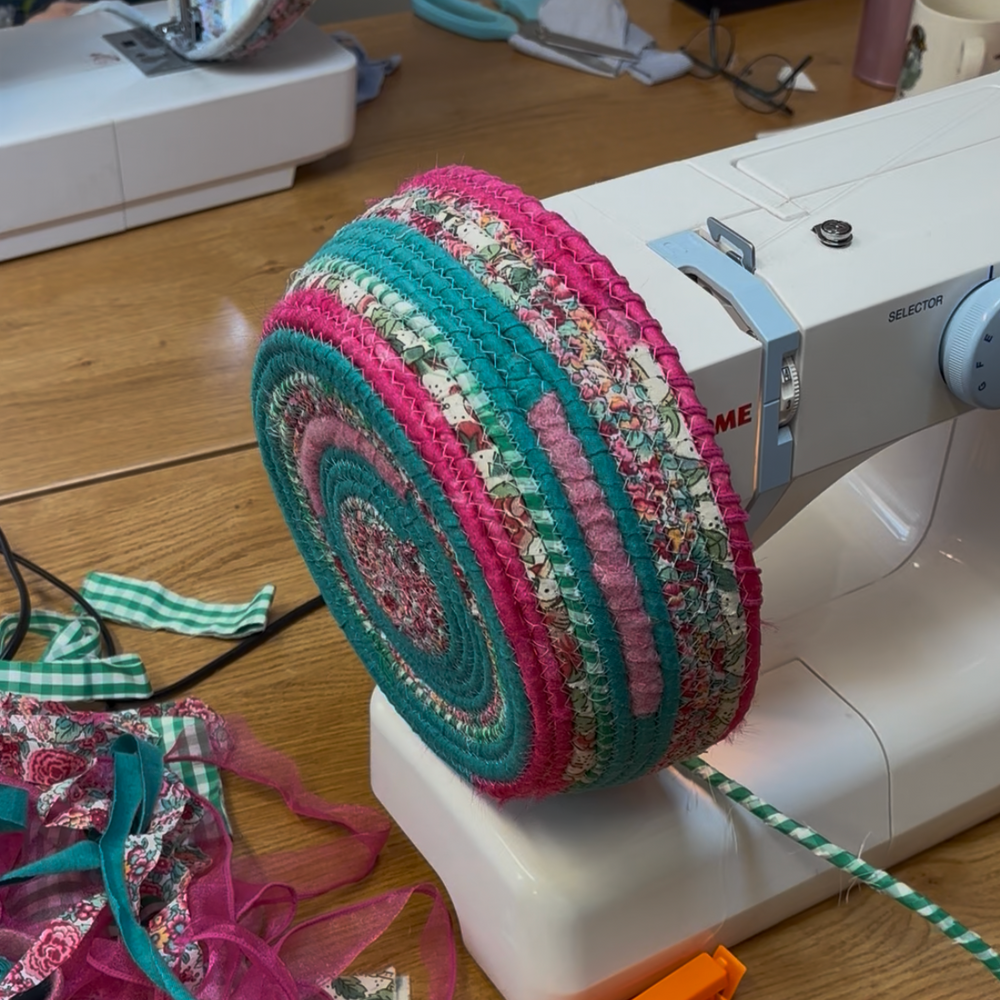
If your machine allows it, widen your zigzag stitch slightly so it reliably catches both coils of rope as you sew. On my Janome, I set the stitch width to 7.0 and put the stitch length slightly longer (2.0), but you can tweak it to suit your machine and the thickness of your rope.
In terms of needles, a universal, denim, or purple-tipped quilting needle all work well. You’ll be stitching through layers of fabric and rope, so it helps to have a needle that can handle thicker material without breaking.
The zig zag stitch becomes part of the finished design, so you can decide whether you want it to blend in (by matching your thread colour to the fabric) or stand out with a contrasting colour. One fun tip: use different coloured threads in the spool and bobbin for a subtle two-tone effect that shows on the front and back of your piece.
Make sure you go slowly around tight curves and guide the rope gently under the foot – no need to rush. Once you get the rhythm, it’s a really satisfying and meditative process!

Want to see the coiled rope technique in action? Watch our FREE "Coiled Rope Placemat" tutorial video below...
We've created a free YouTube video specifically designed to help beginners learn how to coil rope for the first time. Drop us a like or comment if you get a second as it motivates us to make more!
Got any questions? Read our FAQs section below or comment on any of our videos if you're unsure. For more advanced projects and to learn in person, check out our 5* rated rag rug workshops here.
Coiled Rope Placemat Tutorial Video
In this step-by-step coiled rope placemat tutorial video, Elspeth shows your the basics of how to cover the cord and how to start off sewing on the machine.
Top Tips for Beginners
1) Test your zig zag stitch on a piece of doubled up cotton before starting on the cord itself. Make sure you're happy with the width and length of the stitch.
2) If your machine isn't handling the cord at first, adjust your tension higher if you can. If that doesn't work, re-thread both the spool and bobbin as this generally fixes any issues.
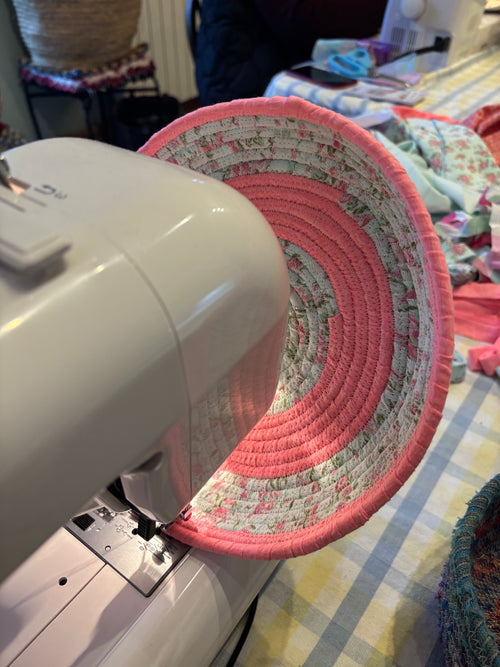
3) Oval shapes are easier than circles as the turns are less tight, particularly at the beginning. Practise with an oval before progressing to circles.
4) To control the patterning better, wrap some cord with fabric then sew a bit, then wrap a bit then sew a bit. Leave the cord attached to the sewing machine to keep the cord taut as you wrap.
5) Place the skein of cord on the floor so it unravels as you wrap fabric strips around it. Anchor it between your legs to keep it taut.
6) The fabric-wrapped end of the cord is vulnerable to unravelling. Clip it to protect it before you get around to sewing it.
7) Sew slowly while you're getting used to where your zig zag stitch is. If you don't catch both sides of the cord then don't panic, you can always come back and zig zag them together later.
Project Ideas & Inspiration
We often share out latest makes on the Ragged Life Instagram page or Facebook page, so those are great resources to see what coiled projects students have made in the past.
For detailed instructions and pretty projects, we also have beginner projects in our second book "Rag Rug Techniques for Beginners".
Great beginner projects include: placemats, coasters, small oval and circular bowls, table runners.
Harder coiled rope projects are larger ones that require more manhandling on the machine and items like handles. Rugs are are slightly trickier due to their size (you have to build out your sewing machine to keep the project flat) and baskets and bags are harder as you need to attach handles.
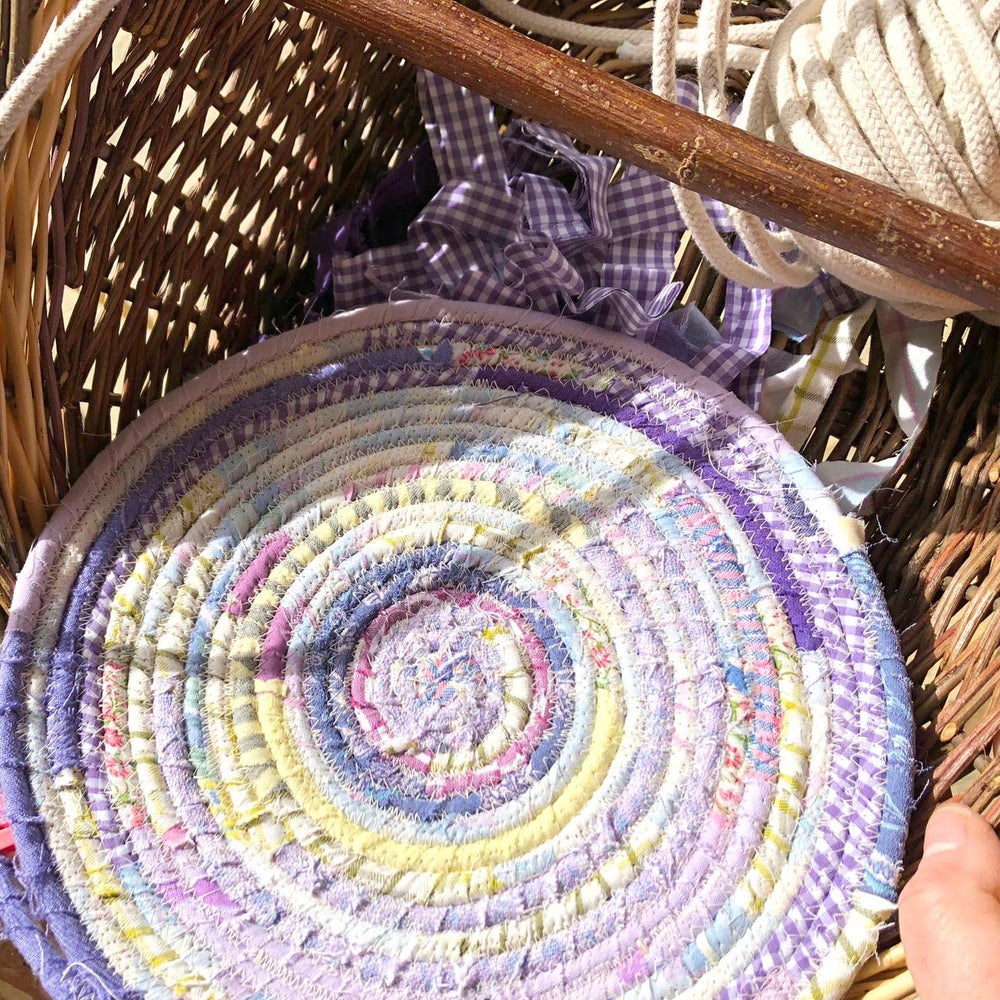
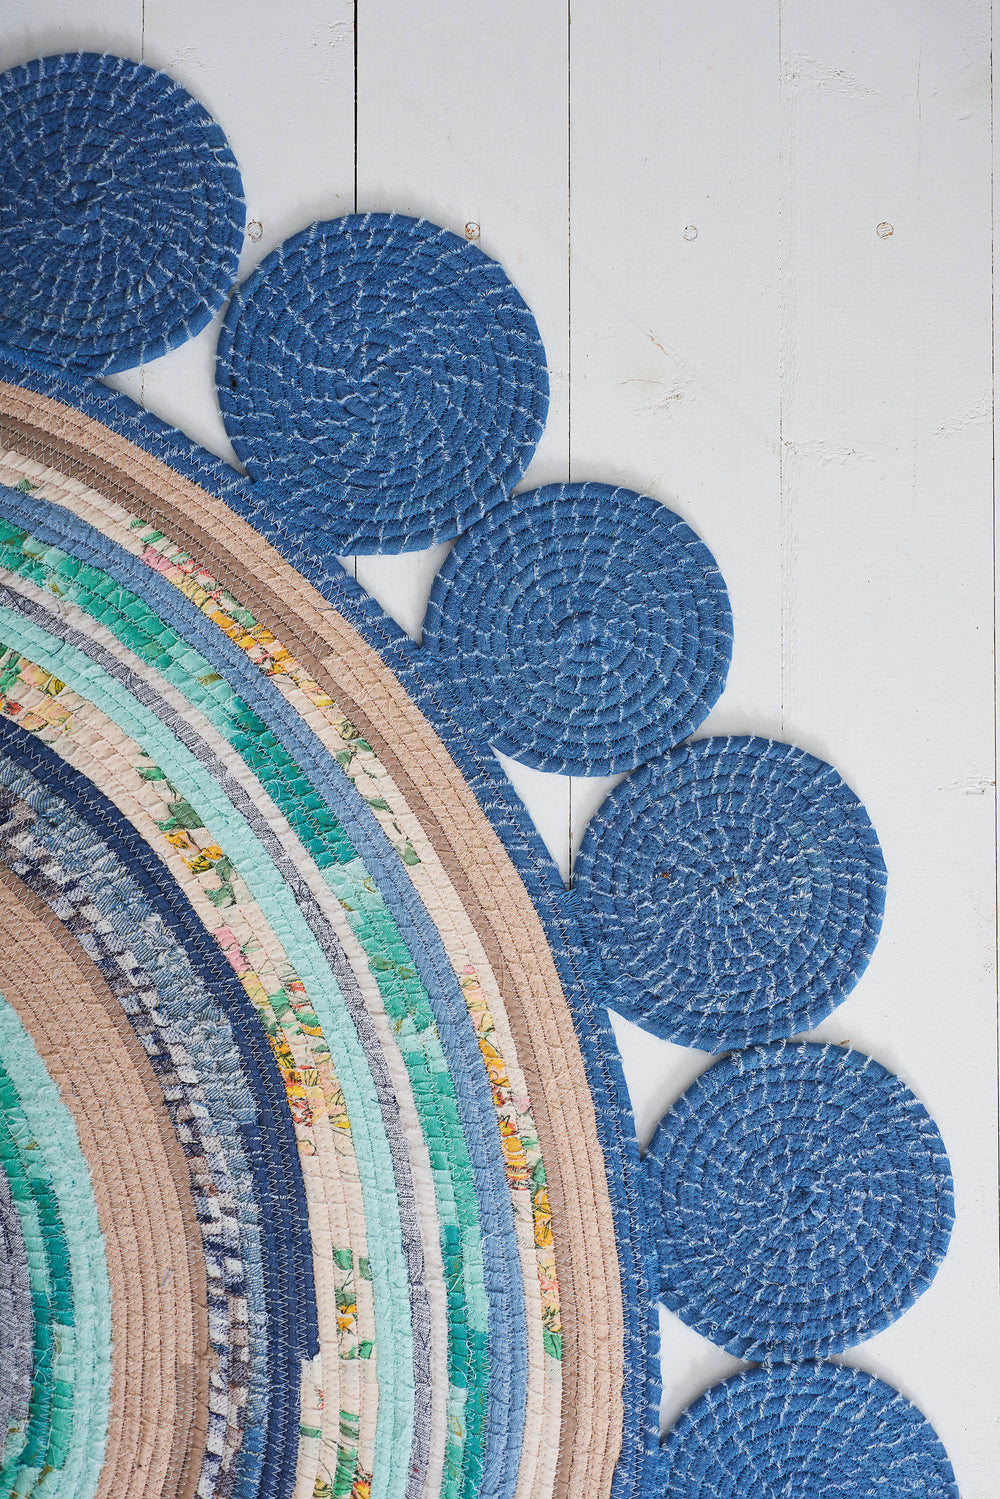
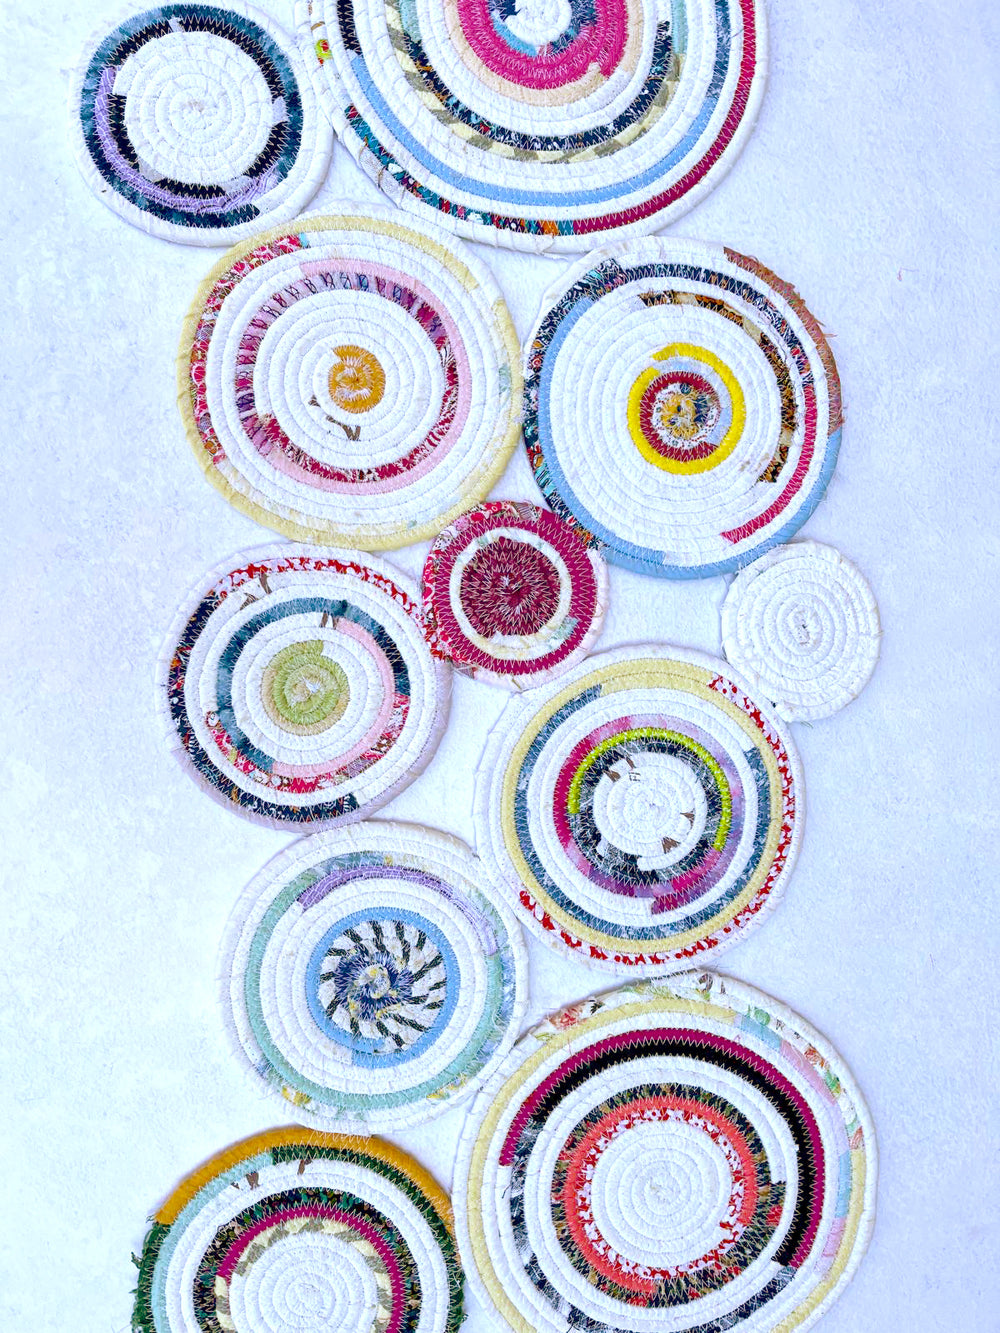
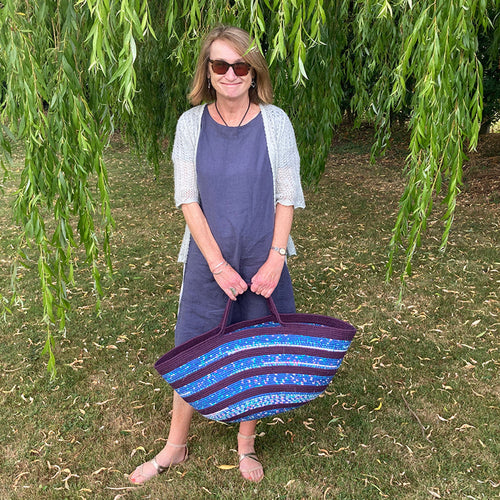
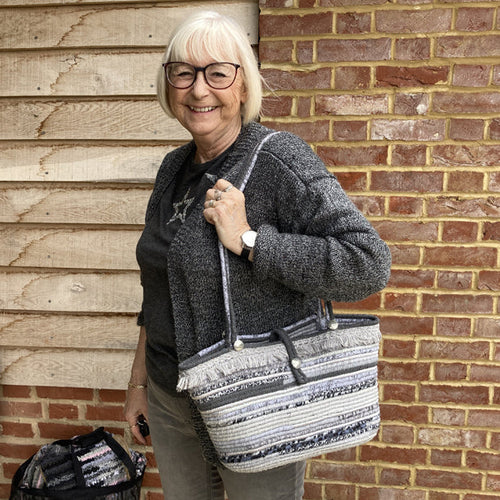
Below are some coiled projects made by the Ragged Life team (top row) and students (bottom two rows) to provide some inspiration.


How Much Cord Do I Need?
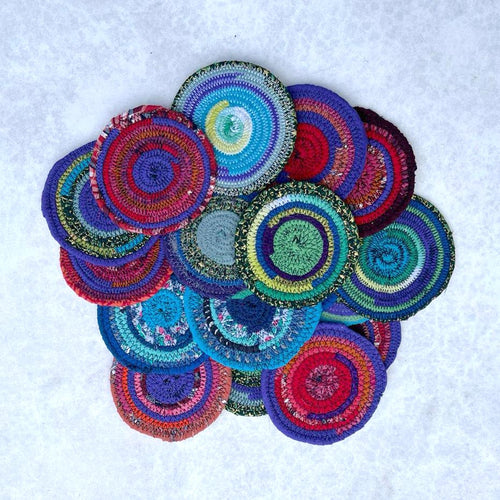
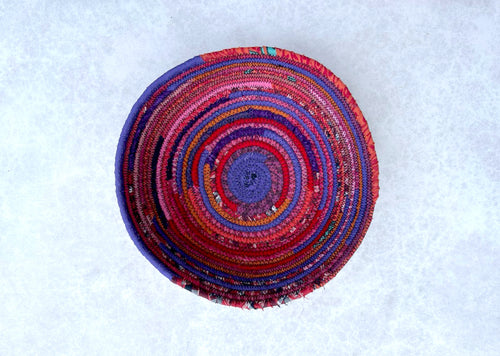
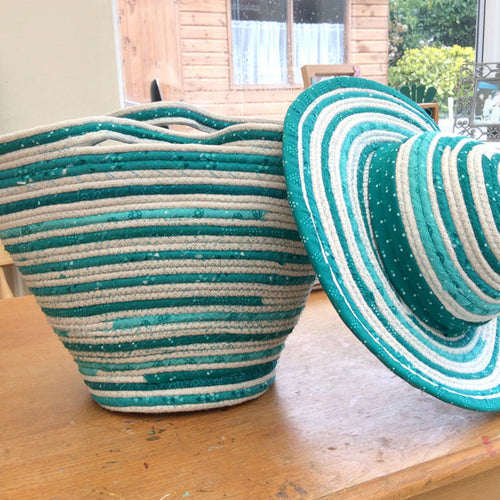
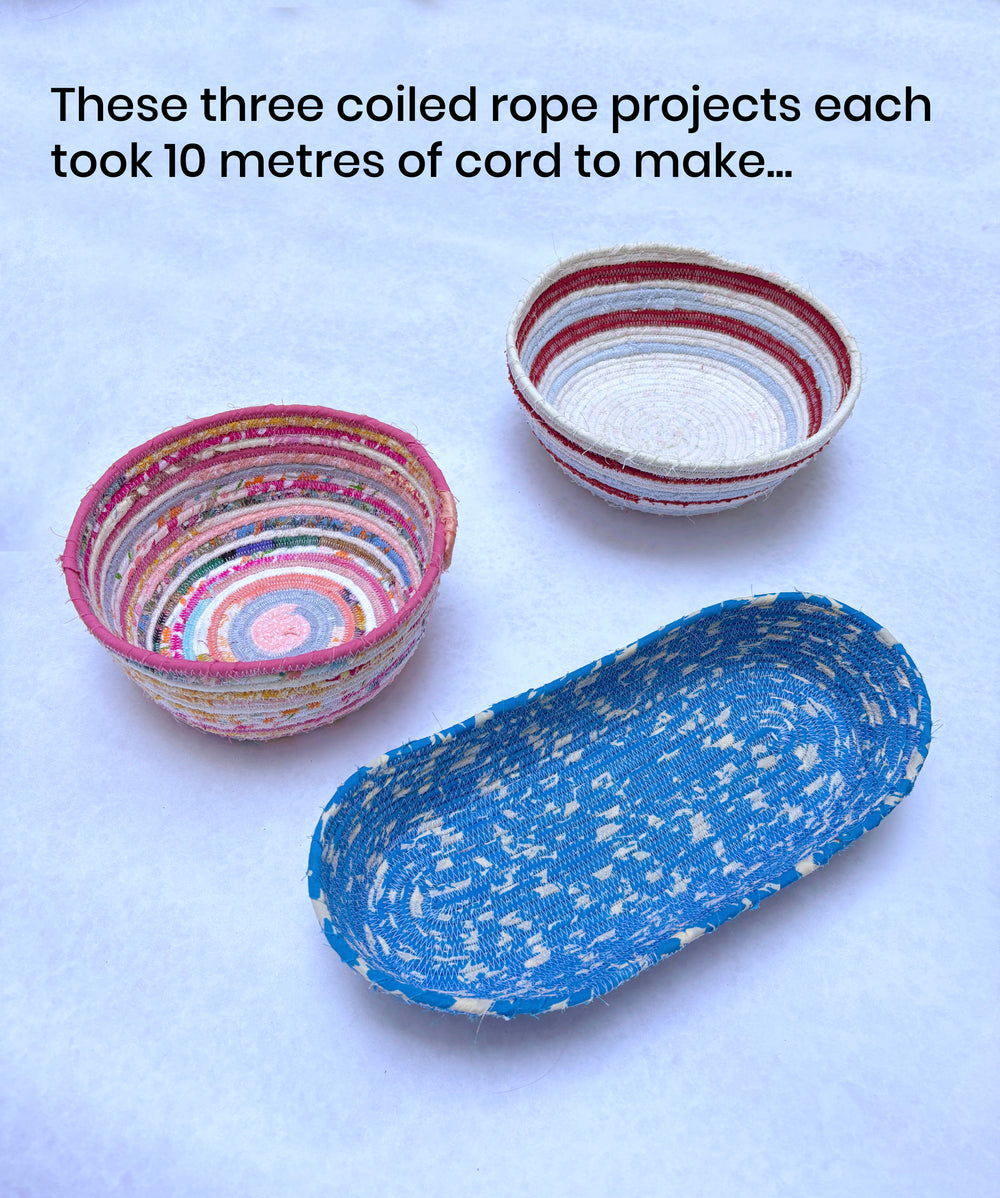
As a guide, it takes around 1.5 metres of cord to make a circular coaster approx 10.5cm in diameter, while 10 metres is enough to create either a circular bowl (about 8cm high x 20cm wide) or an oval drawer organising tray measuring roughly 30cm long x 13cm wide x 5cm high. The three projects on the left were all made using exactly 10 metres of cord.
If you’re thinking bigger, a beach basket usually takes 30 to 50 metres, depending on the size you’re aiming for, and a full-sized circular rug (around 90cm in diameter) takes about 100 metres of cord.
Don't worry if you run out partway through a project, it's very easy to join the cord together!

Cotton Cord for Coiled Rope Rag Rugs & Bowls
We sell our Ragged Life cotton cord in both 10 metre and 30 metre skeins on the Ragged Life online shop, making it easy to get just the right amount.
A 10 metre skein will make one bowl or tray, or six coasters, while a 30 metre skein is great for three medium bowls, a small handled basket, or two to three placemats.
And if your project ends up larger than expected? No problem — lengths of cord can easily be joined together as you go, so you’re never stuck mid-make.
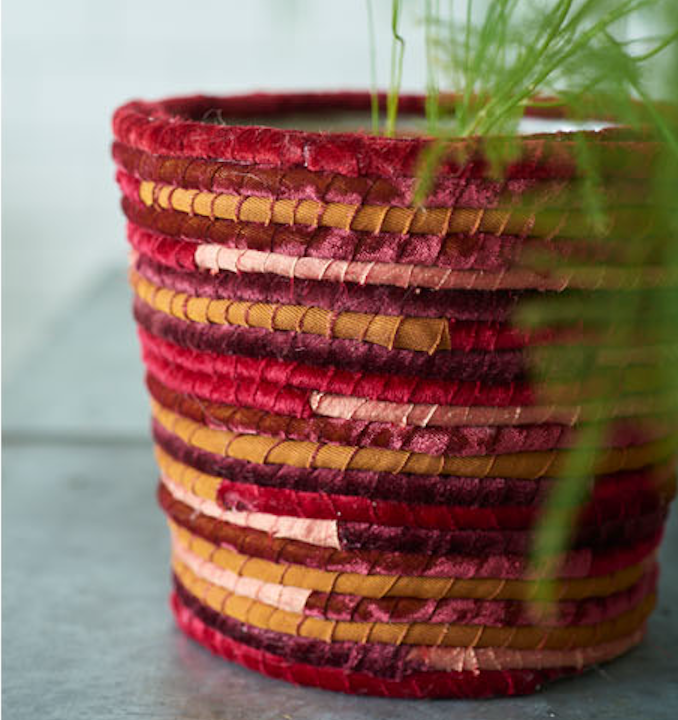
No Sewing Machine? No problem!
Don’t have a sewing machine? No problem at all — you can still enjoy the coiled rope technique with a simple no-sew version that’s just as creative and satisfying.
Instead of stitching your wrapped cord into bowls or baskets, you can use it to cover pre-made items like plant pots, tins, old yoghurt pots, cardboard boxes, bins, and more. All you need is some Ragged Life cotton cord, your favourite fabric strips, and a trusty glue gun. It’s a brilliant way to upcycle and completely customise everyday objects to match your space. Plus, without the zigzag stitch running through the fabric, you get to see the colours and patterns of your materials even more clearly — perfect for bold prints and statement scraps!
Prefer to learn in person?
We teach half day and full day coiled rope bowl and basket classes in various venues across the country, including Hertfordshire, Brighton, York, London, the Lake District, Essex and more. Read more about our full day class below and browse dates by clicking through.

Coiled Rope Baskets & Bags - Full Day Class
Fancy getting hands-on with coiled rope rag rugging? Our Ragged Life Coiled Rope Baskets & Bowls Full Day Class is the perfect way to dive into this fun and versatile technique. Over the course of the day, you’ll learn how to transform simple rope and fabric strips into beautiful, functional creations like bowls, baskets, trivets, and small rugs. We’ll guide you through the wrapping and stitching process, share tips for shaping and finishing, and show you how to get the most out of your materials.
All the tools and supplies are provided, including our signature cotton cord, so all you need to bring is your creativity. Whether you’re a total beginner or looking to try something new, you’ll leave with at least one finished piece and the confidence to continue coiling at home. It’s a relaxed, sociable day full of colour, conversation, and satisfying makes!
Fortnightly Rag Rug Inspiration Newsletter
Sign up for our fortnightly rag rug inspiration newsletter below to be the first to find out when new patterns are released, when tutorial videos go live and to build your craft community. You can unsubscribe at any time!